Quick Start
This guide will get you up and running with Octatrack Manager in just a few minutes.
1. Scan for Projects
When you first open Octatrack Manager, your first task is to find your work.
Click Scan for Projects to let the app automatically search for:
- Removable Drives: Mounted CompactFlash cards and USB drives.
- Common Paths: Folders like
Documents,Music,Downloads, andDesktop. - Octatrack Folders: Any folder on your home directory named
octatrack,Octatrack, orOCTATRACK.
If your projects are in a custom location which is not automatically detected (e.g., an external drive or a specific backup folder), click Browse... to select it manually.
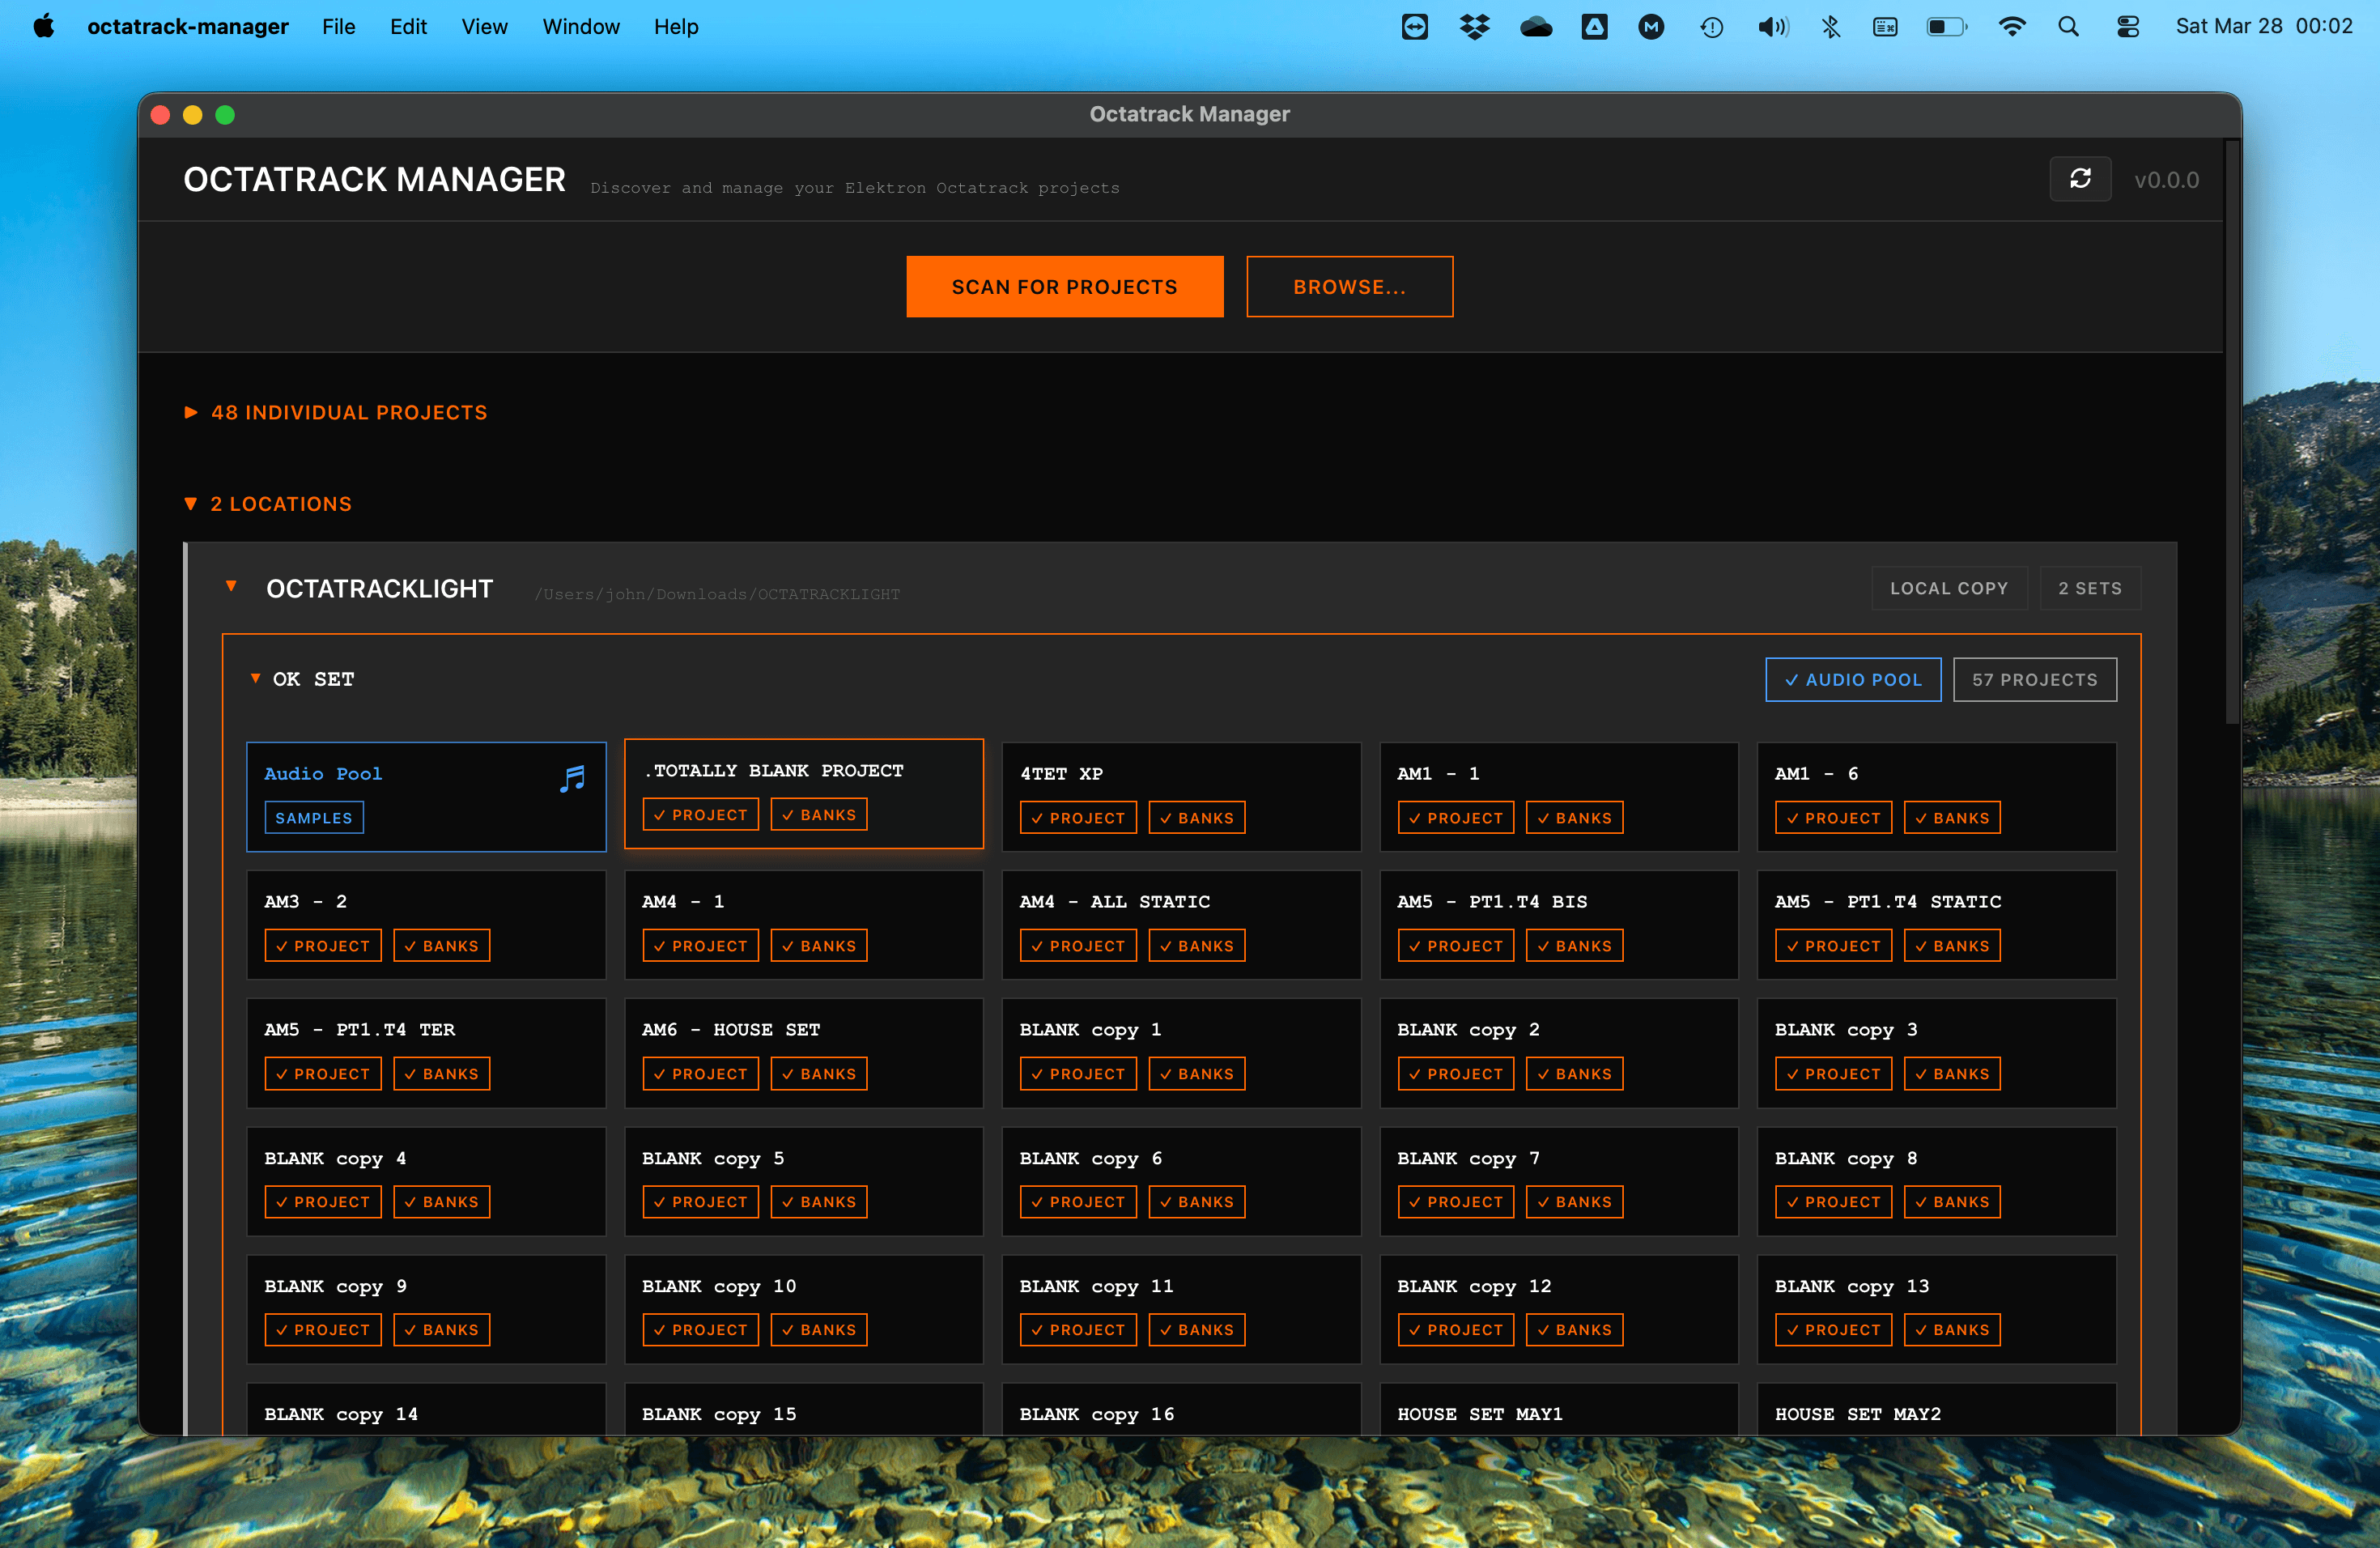
2. Navigate Your Content
Found content is grouped into Locations (where your Sets are located) and Individual Projects (not part of a Set).
- Locations: Each card represents a Set on your disk or CF card. It shows the number of projects inside and if it has a valid Audio Pool.
- Open a Project: Click on any project name to enter the Project Detail view.
- Access the Audio Pool of a Set: Click the Audio Pool card within a Set to manage your samples.
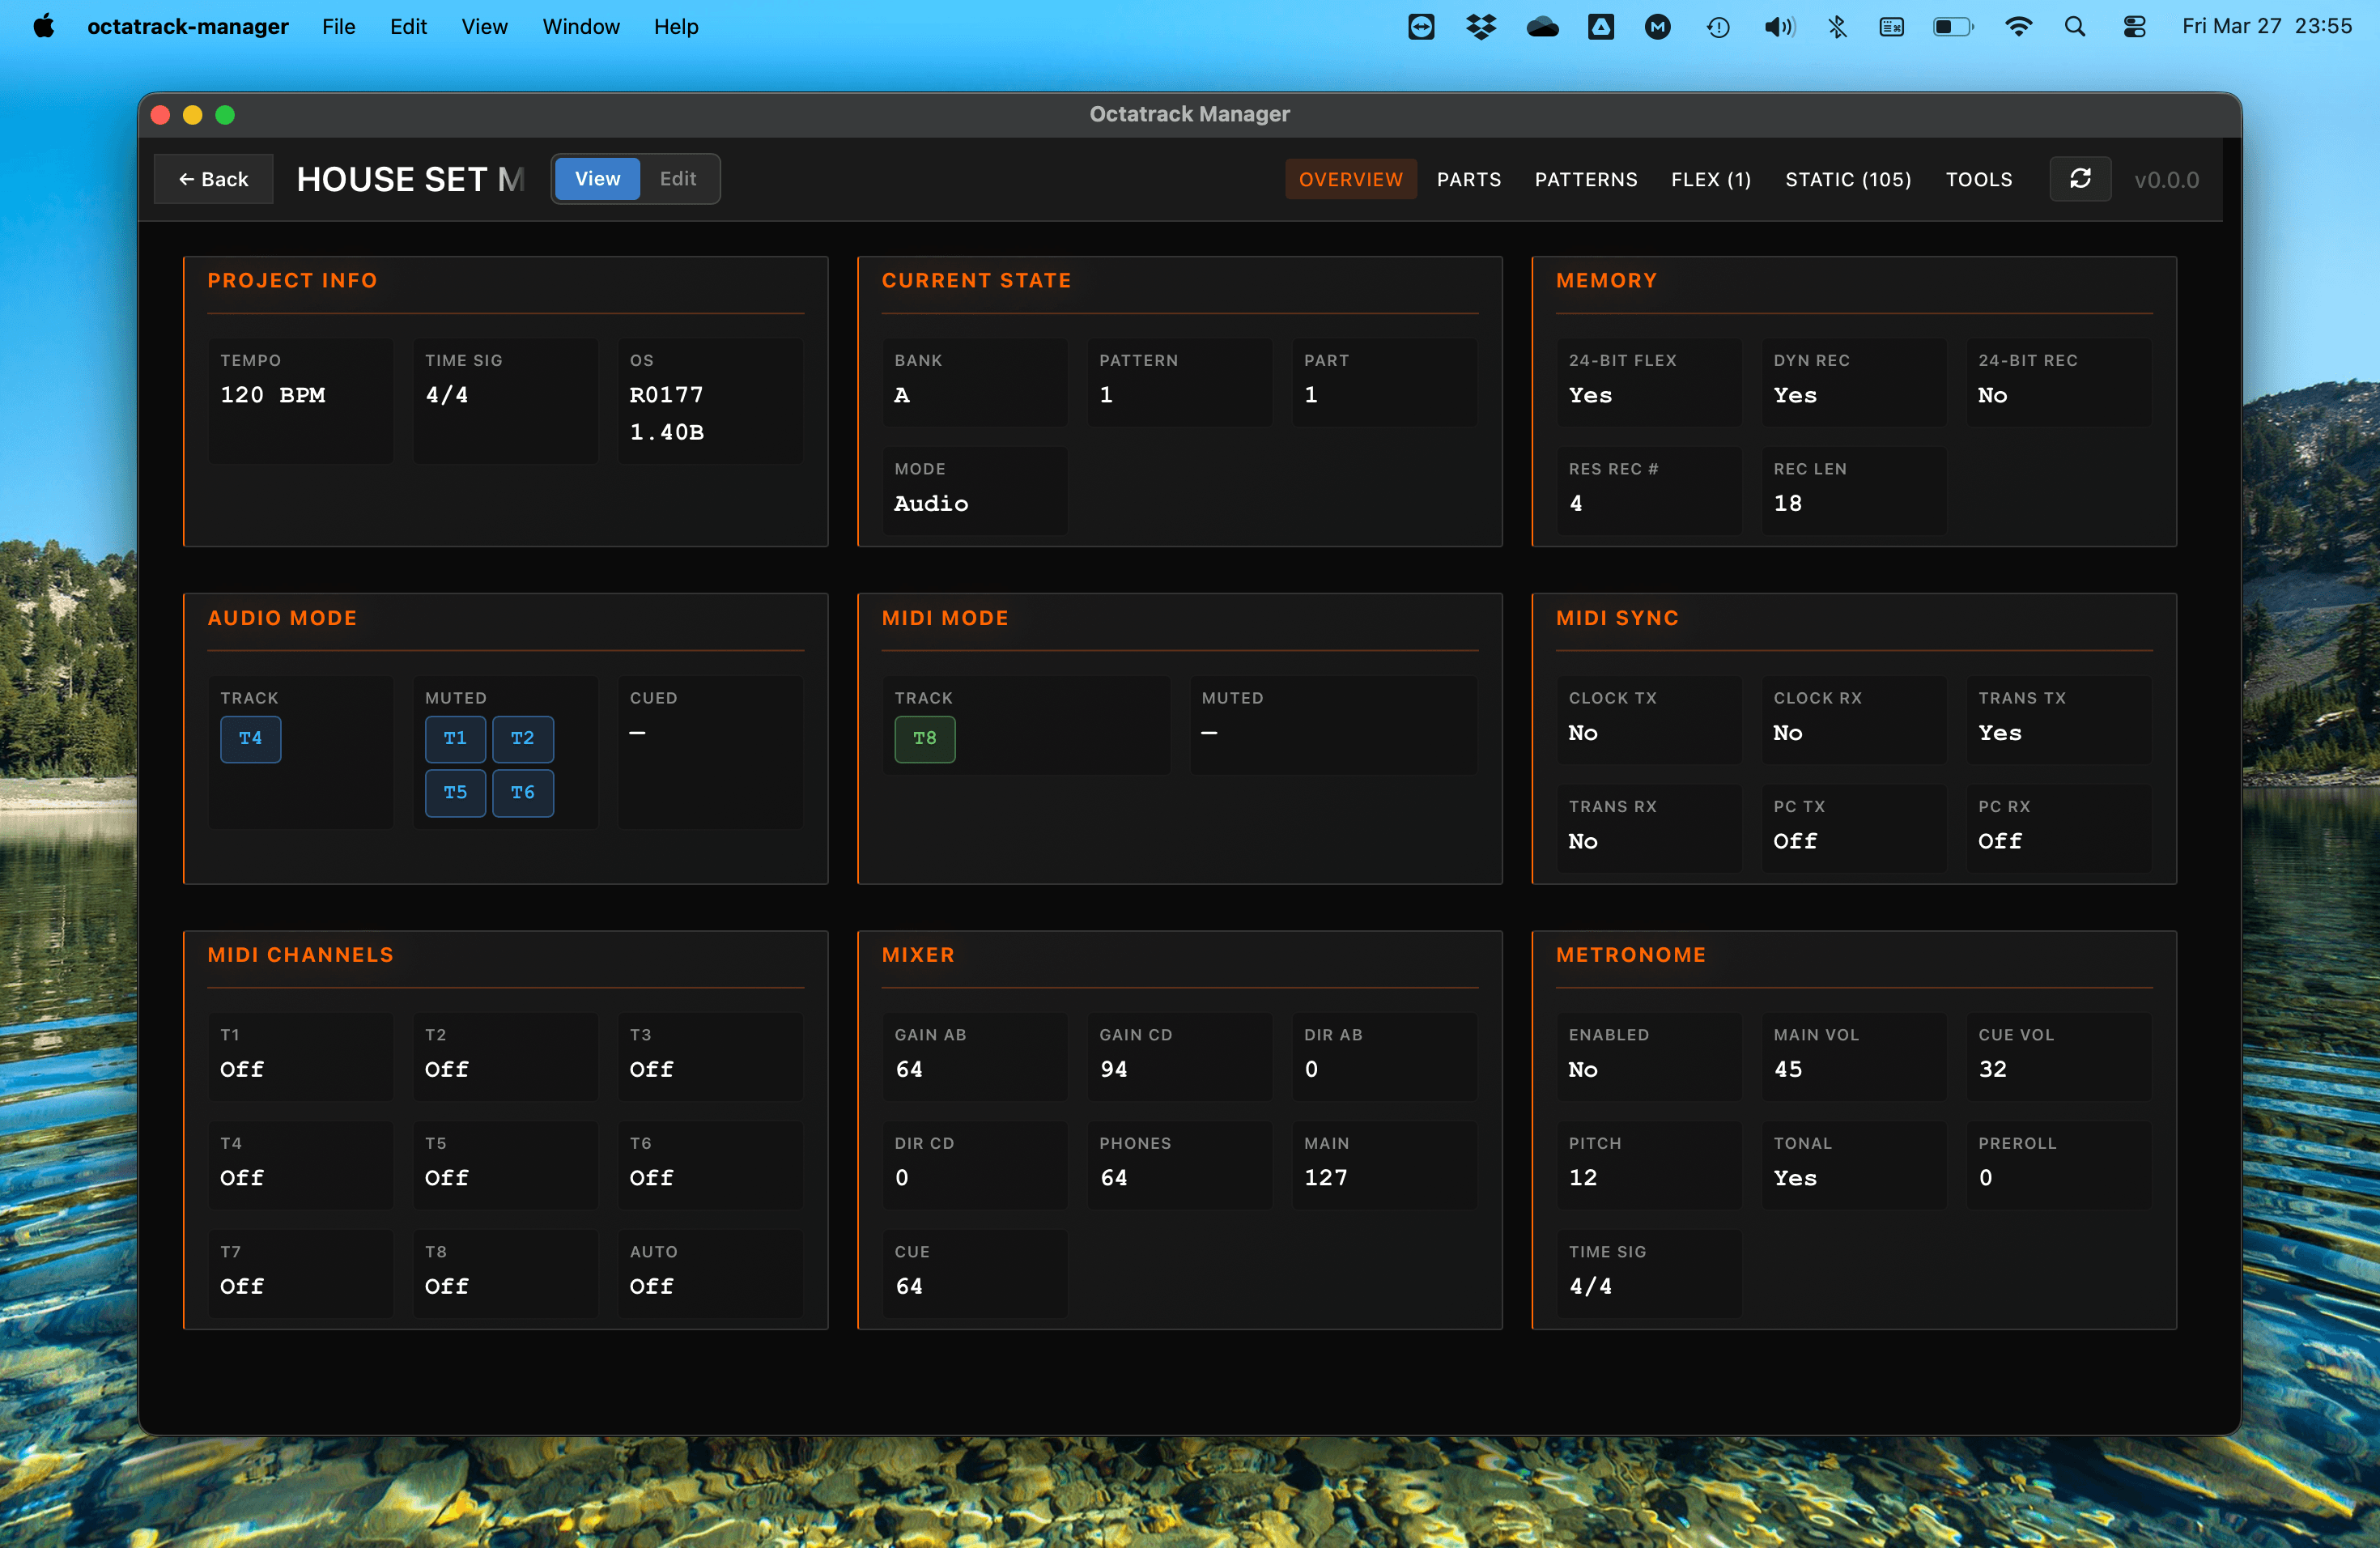
3. Explore Project Details
Once a project is open, you can see everything about it.
The Overview tab shows your mixer, MIDI, memory, and metronome settings. This is a view that helps you understand how the project was configured when last saved.
Switching Between Tabs
At the top of the project view, you can switch between several specialized views:
- Parts: Manage the 4 sound snapshots (kits) for each bank.
- Patterns: Visualize your sequences and triggers in detail.
- Flex / Static: Browse and filter the 256 sample slots.
- Tools: Access bulk copy operations between projects.
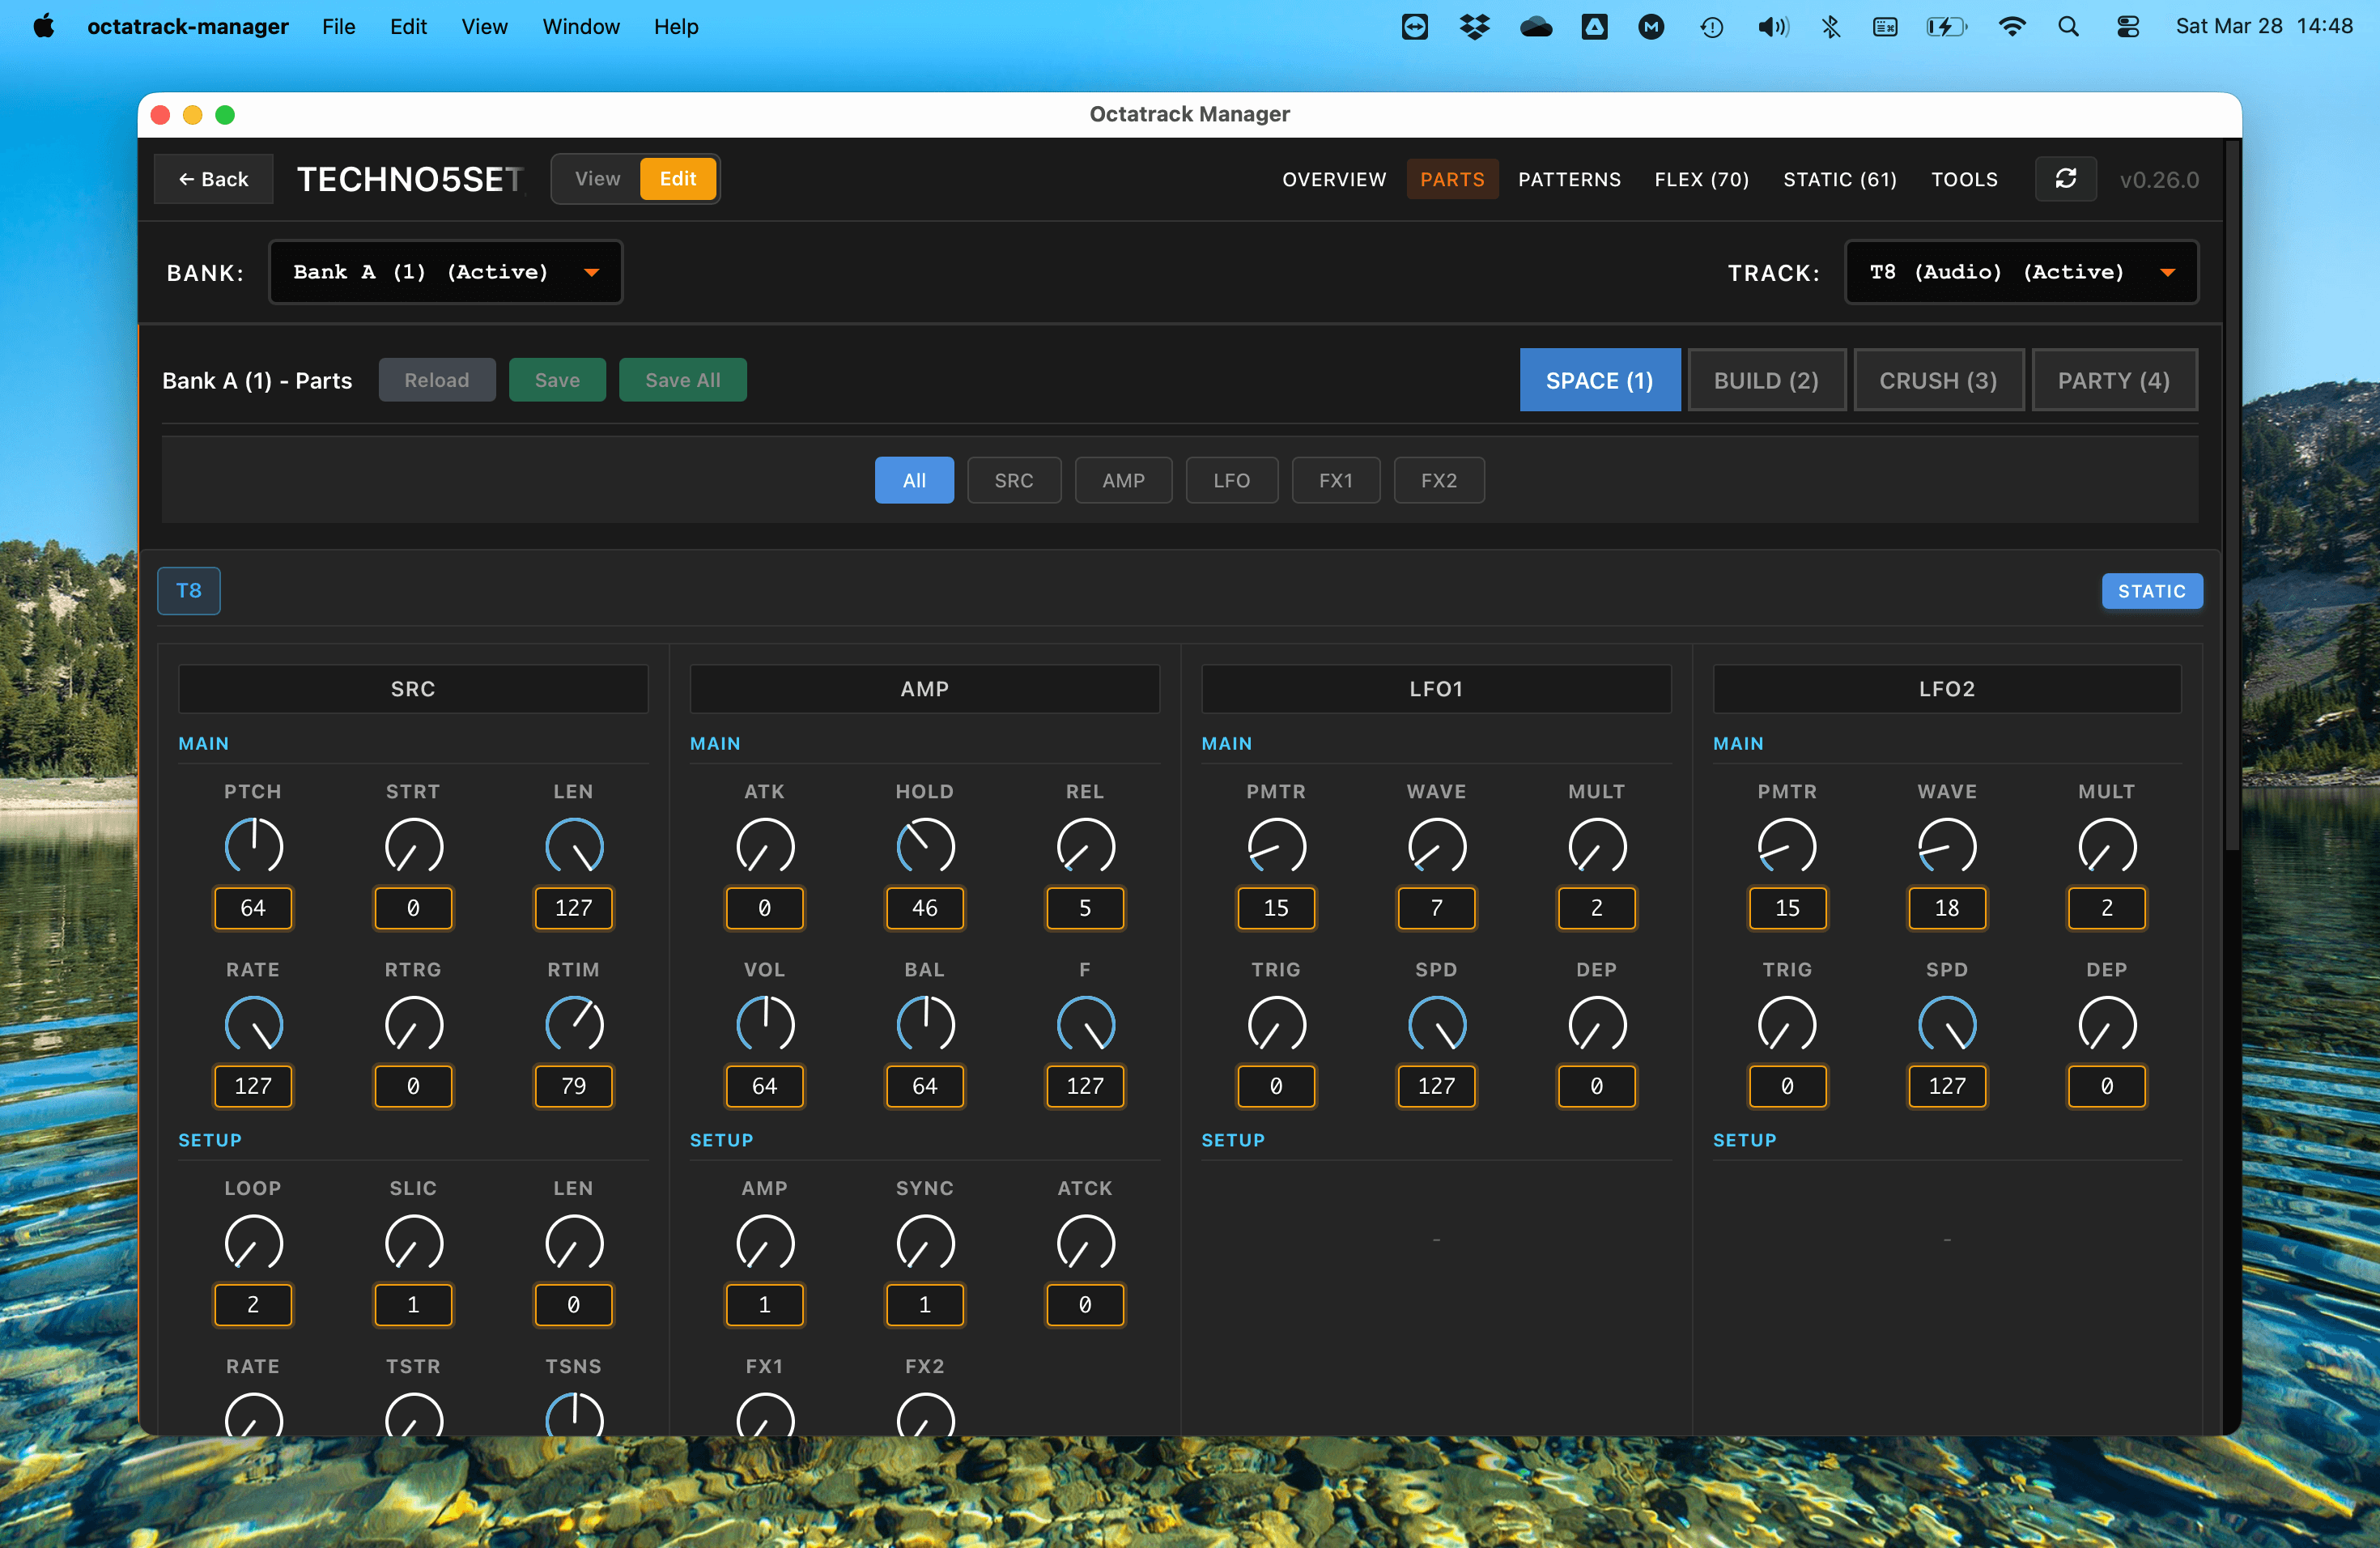
4. Edit a Part
To modify a part, navigate to the Parts tab and select a bank (A–P).
- Select a specific Bank and one of the 4 Parts (Part 1, 2, 3, or 4).
- Toggle Edit mode using the switch in the top header.
- Use the knobs and fields to modify machine parameters, effects, and LFOs.
- Each change is written to project immediately as you make it, in the form of 'un-saved' changes - Just like on the Octatrack.
- Changes can then be saved to the current Part, All Parts, or reverted (reloads to 'saved' state of Part).
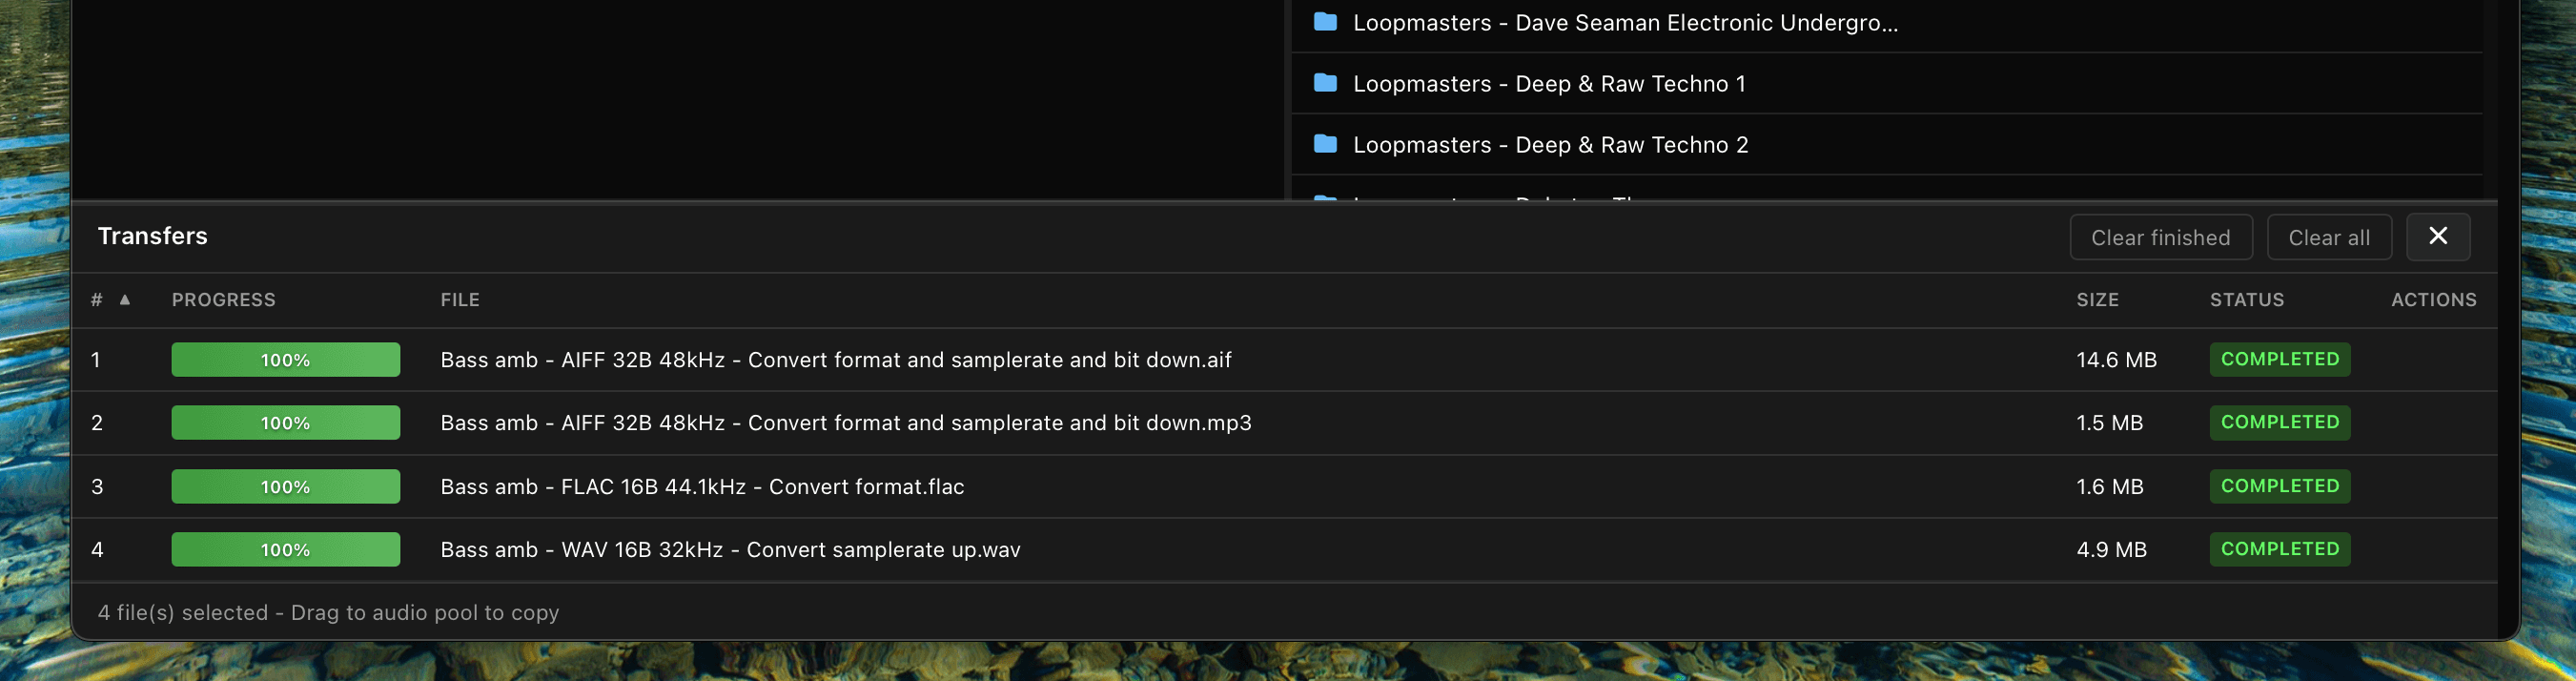
5. Manage Your Audio Pool
In the Audio Pool view, you can move samples from your computer into your Set.
- Browse your computer in the left panel and your Audio Pool in the right panel.
- Select the audio files you want to add.
- Click Copy to Pool.
- Octatrack Manager will automatically convert them as needed - making all audio files compatible with the Octatrack by default (Format, Sampling Rate, Bit Depth).
6. Copy Content Within and Between Projects
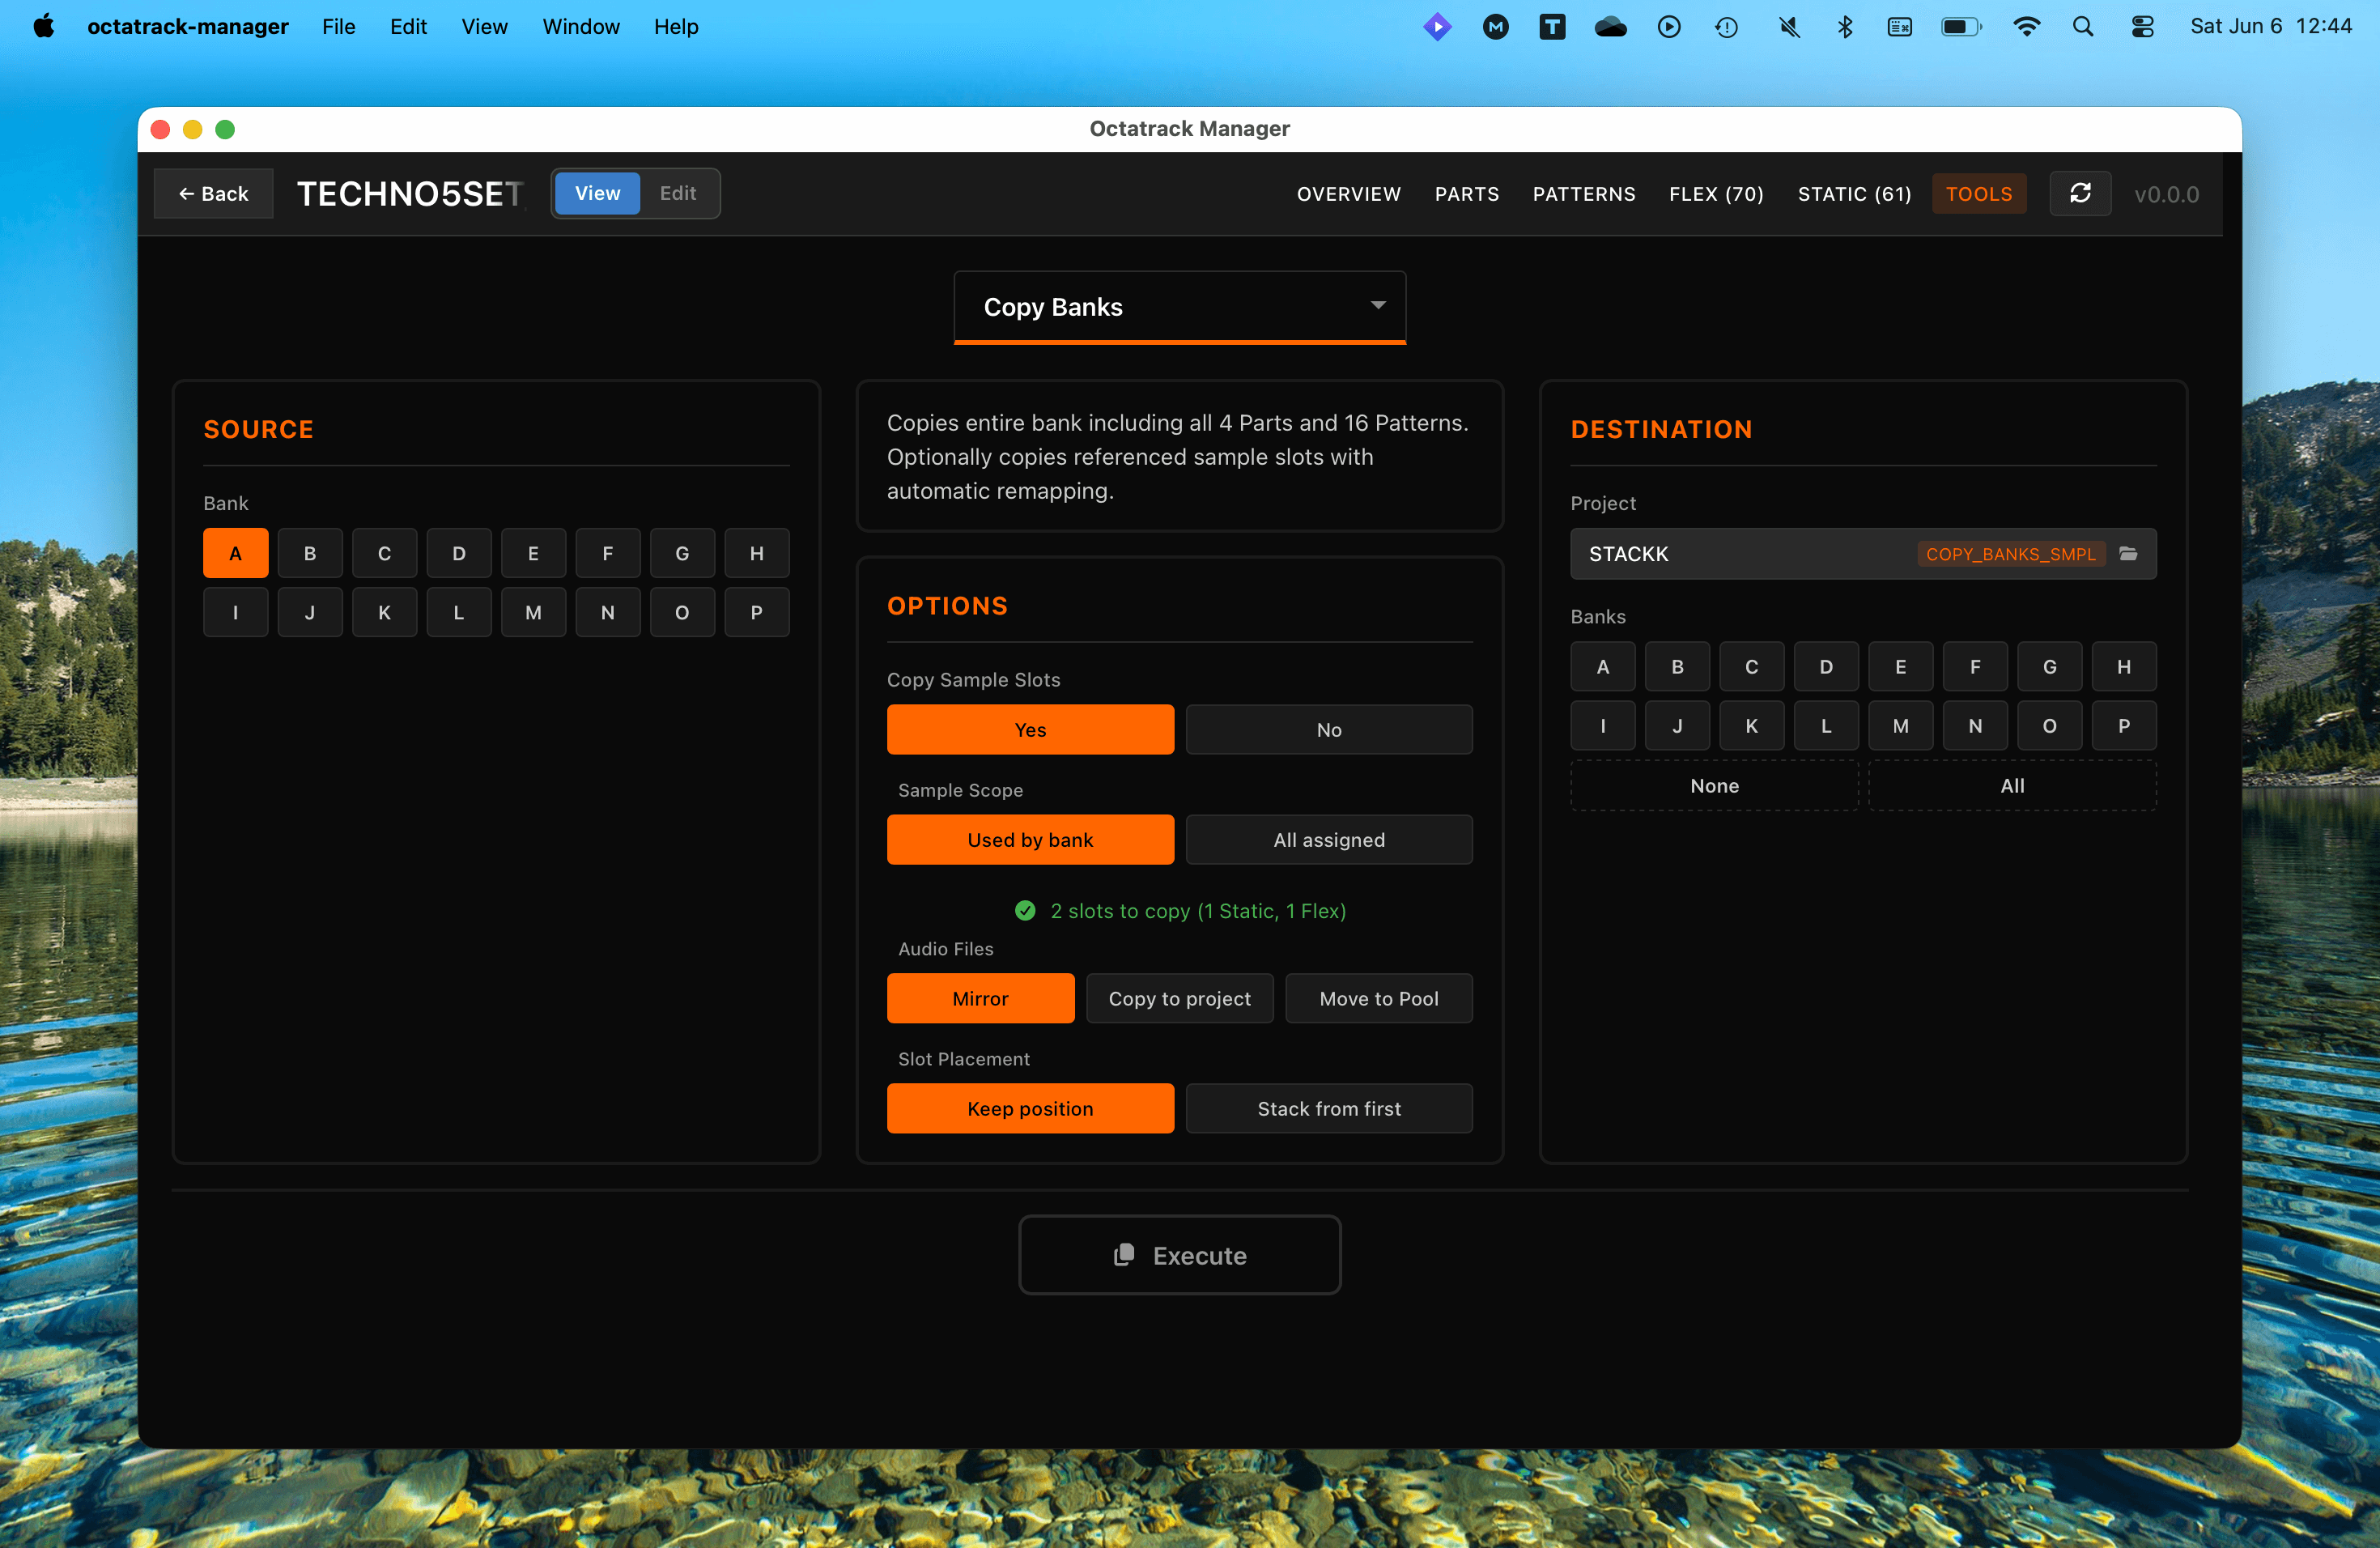
The Tools tab lets you copy content between banks and projects without touching the hardware. Select an operation from the dropdown, configure source, options, and destination, then execute.
Available Operations
- Copy Banks: Copy an entire bank (all 4 Parts + 16 Patterns) with optional sample slot transfer and automatic remapping.
- Copy Parts: Transfer Part sound design (machines, amps, LFOs, FX) between parts and banks.
- Copy Patterns: Copy patterns with configurable Part assignment and track scope.
- Copy Tracks: Copy individual track data — sound design, pattern triggers, or both.
- Copy Sample Slots: Copy sample slot assignments with optional audio file transfer and Audio Pool management.
All operations work within the same project or across different projects.
The destination project can be selected from your scanned locations or browsed manually:

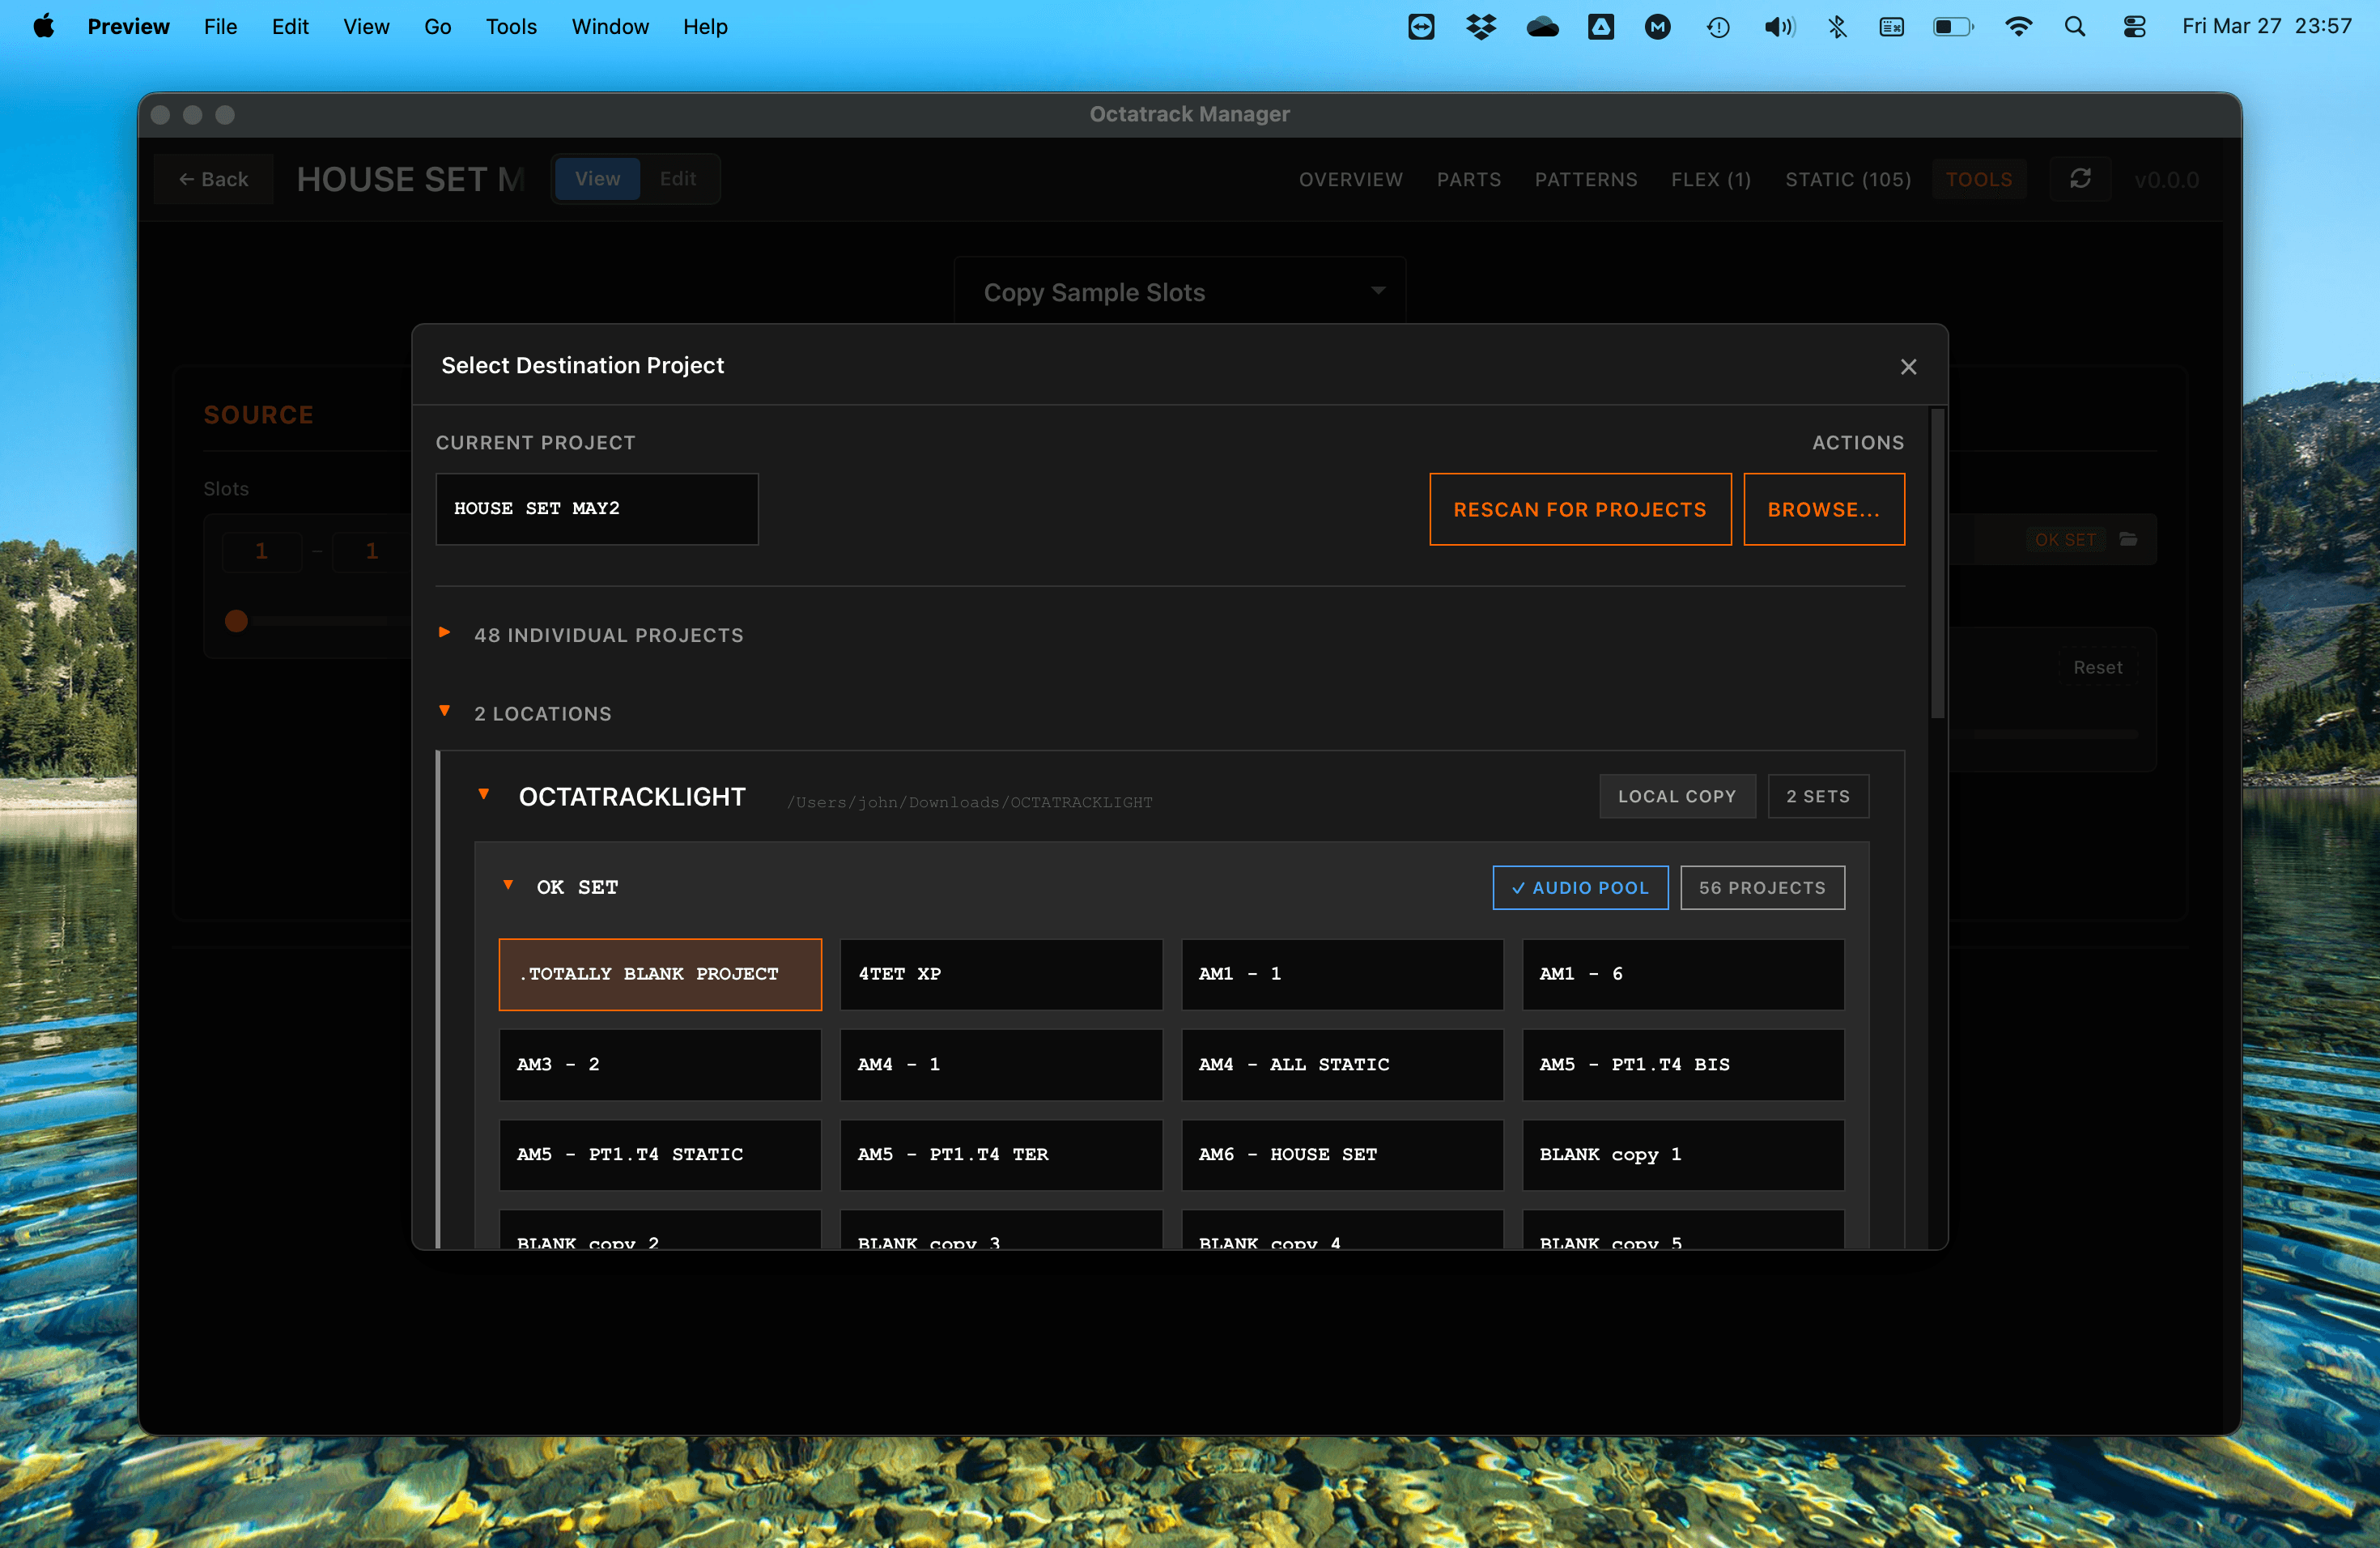
Your copy settings (selected operation, destination project, slot ranges, etc.) are remembered for each project during your session — you can switch tabs and come back without losing selected values.
7. Fix Missing Samples
The Tools tab also includes a Fix Missing Samples operation that scans your project for broken sample slot references and automatically locates and reconnects missing audio files. It searches the project directory, Audio Pool, and sibling projects, with the option to browse additional directories manually.
8. Automatic Backups
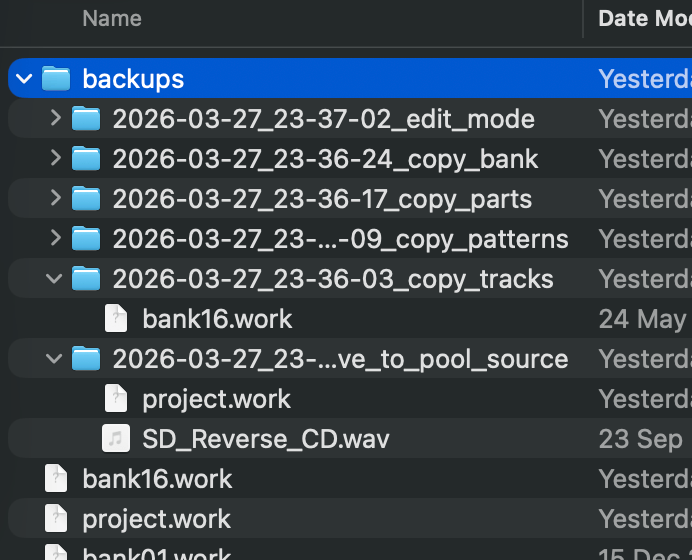
Octatrack Manager automatically backs up your project files before any write operation — whether you are enabling Edit mode, saving a Part, or executing a copy operation via Tools.
Backups are stored inside the project directory under:
<project>/backups/<timestamp>_<operation>/
For example: backups/2026-03-26_14-30-45_copy_bank/
This means you can always revert changes by copying the backed-up files back into the project directory.
What gets backed up:
| Operation | Backed-up files |
|---|---|
| Copy Banks | Destination bank file(s) (e.g., bank01.work) |
| Copy Parts | Destination bank file(s) |
| Copy Patterns | Destination bank file |
| Copy Tracks | Destination bank file |
| Copy Sample Slots (Copy) | Destination: project.work, markers.work, and audio files (.wav + .ot) that would be overwritten |
| Copy Sample Slots (Move to Pool) | Destination: project.work, markers.workSource: project.work and audio files (.wav + .ot) that will be moved/deleted |
| Fix Missing Samples | project.work (and sibling projects' project.work when using Move to Pool) |
| Edit mode toggle (in header) | Current bank file |
While automatic backups provide a safety net, it’s strongly advised to keep your own copies of your projects as well.
Tips
- Refresh: If you insert a CF card, or make any change in Projects while the app is open, click the Refresh (↻) button in the header.
- Version Check: The app automatically checks for updates. Click the version number in the header to manually check and download the latest version.